02 November 2012

naan

I am a bread lover. One of my favorite things about traveling is going new places and checking out the bakeries because they always have something different in their cases than we do here in America. Bread is something that is global. Every nation has their own specialties. In England it is scones (our American version is actually quite different). In Mexico it is tortillias (they are consumed with every meal!!). In India one of the breads is Naan. I haven't visited India personally, so I'm not sure how well this version will line up with what they actually consume, but I enjoyed preparing and eating it.

I made this with an Indian dish called Chicken Tikka Masala (which I will hopefully post a recipe for soon.) I think we even took all the silverware off the table and made everyone eat with their fingers and their naan. It was a fun and cultural evening. This recipe came from a cookbook I have simply called Bread written by Christine Ingram and Jennie Shapter.

Naan
2 cups unbleached all-purpose flour
1/2 tsp salt
1 package active dry yeast
4 Tbsp lukewarm milk (I used almond milk)
1 Tbsp vegetable oil
2 Tbsp greek yogurt
1 egg
2-3 Tbsp melted butter, for brushing

Combine the yeast and milk and set in a warm place for 15 minutes.


 Sift together the salt and flour in a large bowl. Add the yeast mixture, the egg, oil and yogurt to the flour mixture.


Mix until it forms a soft dough. Then turn onto a lightly floured surface and knead for about 10 minutes until smooth and elastic.


Place in a lightly oiled bowl and cover with a towel. Allow to rise in a warm place for about 45 minutes or until doubled in bulk. While it is rising, preheat the oven to its highest setting (at least 450*F) and place 3 heavy baking sheets in the oven to heat.


After the dough has doubled in bulk, turn it onto a lightly floured surface and punch down. Divide into 3 pieces and shape into balls. Roll each ball into a teardrop shape about 10 inches long and 5 inches wide. (This is a rough size. I for sure do not measure when I am making something. I just roll it out.) You want the dough to be about 1/4 to 1/3 inch thick.

Place the naan on the hot baking sheets and bake for 3-4 minutes or until puffed up. Remove the naan from the oven and cover with a towel. Once all the naan have baked, turn the broiler on high and place the naan under the broiler for a few seconds or until they are slightly brownish. Keep wrapped in a towel to keep warm and brush with butter before serving. 


You can also make these into smaller dough pieces, but I liked serving it this was so that we had to tear off pieces from it during dinner. It was a very Biblical moment of breaking bread with my brothers and sisters. Enjoy!

31 October 2012

real lemon bars

Remember when I was telling you way back when that I was craving a really good, tart lemon bar? Well, I decided to make up my own recipe because all the ones I came across were just to much sugar and not enough lemon for me. So here is my real lemon bar recipe.

Real Lemon Bars
Crust: 
1 cup butter, softened
1/2 cup sugar
2 cups unbleached all-purpose flour
Optional: lavender and lemon zest
 Topping:
3/4 cup sugar
3 eggs
1/2 cup lemon juice
2 Tbsp flour
juice and zest of 2 lemons (part of the zest could be in the crust)

Preheat oven to 350*F. Cream together butter and sugar.


Add 1 cup flour and lavender/lemon zest if using them. Add second cup flour.


Press into a lightly greased 9x13 pan.


Bake at 350* for about 14 minutes or until light golden brown.


While the crust is baking, mix together all the ingredients for the topping.


Look at that beautiful crust!


Pour the topping over the crust and bake at 350* for about 15 minutes. Watch it carefully because the topping will burn very easily. If it looks a little runny that is okay as they will set more as they cool.


Enjoy your tart slice of lemon-y goodness!


29 October 2012

tatzaki

I have a special love for Greek things. I'm not sure where exactly this love came from because my family is not Greek. I have never been to Greece (although it is on my list of top places I would like to go next). I think it is because my name is Greek in origin, and I love my name. I don't remember the first time I had tatzaki sauce, but I feel in love with it. It has a slightly tangy flavor along with the freshness of cucumber. I always think it is perfect for summer, but I will eat it any time of the year. I serve this sauce with Greek food as well as with Chicken Tikka Masala which is an Indian dish, but I like the way the flavors combine. You could also serve this with pita bread as an appetizer or dip at a gathering.


Tatzaki
1/2 cucumber, chopped into small cubes
1/4 small onion, diced
2 garlic cloves, finely diced
 1 Tbsp fresh parsley, finely chopped
2 cups plain yogurt (I use greek yogurt)
salt and pepper to taste
juice of 1/2 lemon
1/4 tsp paprika, to garnish

Combine all the ingredients and garnish with the paprika. Cover and allow to chill for at least an hour, but honestly the longer you let it sit the better the flavors will mingle and combine and be delicious. 

26 October 2012

chocolate "crack" cookies


I have two kinds of crack cookies that I make. One is ginger molasses crack and the other is chocolate crack. Why do I call the crack cookies? Well, because you just can't stop eating them. It is nearly impossible once you have had one you have to have another. Especially fresh out of the oven these are irresistible. My recipe is adapted from Alice's Tea Cup's recipe.

Chocolate Crack Cookies
3 cups unbleached all-purpose flour
1 cup unsweetened cocoa powder
1 tsp baking soda
1 tsp salt
1 cup dark chocolate chips
1 cup unsalted butter, softened
1 cup dark brown sugar
4 eggs
2 tsp vanilla
1 cup dark chocolate chips (this isn't a repeat)
Raw sugar for sprinkling

Preheat oven to 350*F. Combine the flour, cocoa, soda, and salt in a bowl and set aside. Melt the first cup of dark chocolate chips in the microwave (you can also use a double boiler on the stove top) being careful to make sure you don't burn the chocolate. Use a mixer to cream together the butter and sugar. On low beat in one at a time the chocolate, eggs, vanilla extract and dry ingredients. Mix until fully combined and smooth. Mix in the second cup of dark chocolate chips by hand. Scoop out dough and place on a non-stick cookie sheet. Sprinkle tops with raw sugar and bake in the oven for about 10-15 minutes. Let cool on the cookie sheet for just a little bit and enjoy! Try not to eat them all at once!    

25 October 2012

salted caramel chocolate cupcakes

I found this recipe on pinterest. Yes, I do have a pinterest, and yes, I do actually make recipes that I find on there. I love these cupcakes because they are just heavenly. Salted caramel, chocolate and did I mention salted caramel. Yum!

Salted Caramel Chocolate Cupcakes
1 1/2 cups dark brown sugar
1/2 cup butter, softened
2 eggs (you could easily substitute applesauce here)
1 tsp vanilla
1 1/3 cups unbleached all-purpose flour
1/4 cup + 2 Tbsp cocoa powder
1 1/2 tsp baking soda
1/4 tsp salt
2/3 cup sour cream
2/3 cup boiling water

Preheat oven to 350*F. Begin by creaming together the butter and brown sugar until light and fluffy.


Mix in the eggs, one at a time and then the vanilla, beating well.


In a separate bowl combine the flour, cocoa powder, salt, and baking soda. Add this mixture alternately with the sour cream, mixing on low until just combined. Mix in the water.


Pour batter into cupcake liners* and bake at 350 degrees for 15-20 minutes.


Allow the cupcakes to cool while you make the salted caramel filling. This is the salted caramel recipe that I use, although you will find a different one on the original cupcake recipe.

Then cut little divets in the top of the cupcakes using a small, sharp knife. Pour the salted caramel sauce into this divets.


Top with salted caramel cream cheese frosting.

Salted Caramel Cream Cheese Frosting
1 8-oz. package cream cheese, softened
1/2 stick butter, softened
2 cups powdered sugar
1/2 tsp vanilla
salted caramel sauce to taste

Beat cream cheese until smooth. Beat in butter until smooth. Add in powdered sugar and vanilla and beat until smooth. Beat in salted caramel.


These cupcakes are so delicious. I'm serious. My mouth is watering right now as I am thinking about them, and I'm thinking it has been too long since I last made them. Please make and love! :)

*A helpful hint that my sister shared to help with pouring cupcakes is to use an  ice cream scoop. It is super easy and all of your cupcakes come out very uniform.

21 September 2012

salted caramel


I am obsessed with salted caramel. I love it. I crave it. I keep a jar in my fridge at all times. I especially love how easy it is to make. Now the first time I tried, I did not succeed, but I have since made several perfect batches of salted caramel, and I feel quiet comfortable with it. This is my favorite recipe I have found, and I don't think it's a coincidence that it's from a blog called Brown Eyed Baker. I was meant to find it. We were meant to be together. It's a beautiful friendship we have going on.


Salted Caramel
2 cups granulated sugar
12 tablespoons unsalted butter, at room temperature
 1 cup heavy cream, at room temperature
1 tablespoon sea salt

Start by putting the sugar in a large saucepan over medium heat, and whisk as it begins to melt. The sugar will form little clumps, just keep whisking. When the sugar has melted stop whisking and just swirl the pan. You want all the sugar clumps to melt down before you proceed. Be careful to watch it though because it will burn very quickly. When it has achieved a nice caramel color and all the sugar clumps are melted, add the butter in and whisk as it combines. It will bubble up, so be careful and make sure you use a big enough pan. Then add the cream slowly. Again it will bubble, whisk until smooth. At this point I leave it on the heat for just a little while. Then remove from the heat and add the salt. Honestly, I don't measure the salt. I just add salt and taste until it achieves the amount of salty-sweetness that I desire. Besides it gives me a chance to make sure it is perfect. 

Again, don't get discouraged if you don't get it the first time!! Just keep trying! Because trust me, the result is well worth the effort!

17 September 2012

Pumpkin Lovin'


Please, try these today. They are amazing! And you will love me forever for telling you to make them. A sweet friend who is getting married and moving out of the country in 3 weeks came over tonight so we could have a baking date one more time. I saw this recipe and wanted to try it, so I thought this would been the perfect opportunity to try it out. It's super easy, and you should have everything to make them in your pantry.

Pumpkin Poppers 
(Because you will want to pop them all in your mouth) 
1 3/4 cup all-purpose flour
2 tsp. baking powder
1/2 tsp. salt
1/2 tsp. cinnamon
1/2 tsp. nutmeg
1/2 tsp. allspice
1/8 tsp. ground cloves
1/3 cup vegetable oil
1/2 cup brown sugar
1 egg
1 tsp. vanilla extract
3/4 cup pumpkin
1/2 cup milk (I used almond milk)

Preheat oven to 350 degrees. 

Combine flour, baking powder, salt, cinnamon, nutmeg, allspice and cloves and stir to combine. 

In a separate bowl combine oil, brown sugar, egg, vanilla, pumpkin and milk and whisk. 

Pour the dry ingredients into the liquid ingredients and mix until combined. 

Fill a mini muffin tin cups until almost full. Bake about 10 minutes. Allow to cool for a little bit.

Melt 1 stick butter. In a separate bowl combine 2/3 cup sugar and 2 Tbsp. cinnamon. Dip the poppers in the butter and then in the cinnamon/sugar mix and try not to eat each one you dip. Enjoy!!

P.S. I finally got an SD card reader, so there will be blog posts in the near future whenever my life calms down enough for me to post some.

06 June 2012

feeling lemon-y

Hey everyone! Sorry I haven't updated in a while. I've been busy and on top of that I got a new computer last month and have yet to get an sd card adapter to download my pics (my old computer had one built in). I love my bright shiny macbook, so I will be okay with getting an adapter. :)

Well, I just ate my first fresh blueberries of the season. . .yum!. . .but I've been feeling very lemon-y lately. I've been searching for a great lemon bar recipe, one that will satisfy my desire for tart, lemon-y flavor with just a hint of sweet, but I have been unfruitful as of yet. I'm hoping to adjust a recipe and try it tonight.

In the meantime, you have some cupcake recipes to look forward to (once I have procured the sd card adapter that is). So stay tuned for deliciousness coming your way soon!

12 May 2012

Another Daniel Fast Meal


This was an incredibly filling meal and again made a large pan of food that feed my roommate and I for several days. This was two separate dishes. It is a black bean chili bake served with broiled polenta squares. I started by making the polenta because it needs to sit in the fridge to set up.

Broiled Polenta Squares
6 cups water
1/2 Tbsp garlic salt
2 1/2 cups yellow cornmeal
1 tsp dried basil

Bring water to boiling in a large saucepan. Add the garlic salt. Reduce heat to simmering and slowly pour the cornmeal and basil into the pan in a thin stream, stirring constantly. Continue to stir until the polenta is thick and pulls away from the sides of the pan. With a paper towel rub the sides and bottom of a 9x13 pan with water to prevent sticking. Press the polenta into the pan until well packed. Cover and allow to sit in the fridge for 2 hours or until completely cooled. 

When ready to serve, cut the polenta into squares and place on an oiled cookie sheet under a high broiler (a toaster oven will also work) until they are slightly browned and crispy on the outside. 

 Black Bean Chili Bake
2 cans black beans, drained and rinsed
1 large can chunky tomato sauce
2 cups cooked brown rice
1 can corn kernels, drained
1/2 cup diced onion
1 Tbsp chili powder
sprinkle cayenne pepper
sprinkle garlic salt
sprinkle cinnamon

Put beans in a large bowl and mash until they are about half crushed. Add remaining ingredients and stir until will combined. Put in a 9x13 that has been lightly rubbed with olive oil. Bake in a 350*F oven for 15-20 minutes or until warmed through. I served this with avocado on top and some green bell pepper on the side.

10 May 2012

Baked Oatmeal

I recently went on a Daniel Fast. For anyone who doesn't know what that is I will describe it briefly for you. Basically you eat fruits, veggies, whole grains (like brown rice and oats), and beans. So for someone who enjoys food as much as I do, this can be incredibly difficult. The plus side is that I feel awesome! I feel spiritually, mentally, and physically very clean and focused. I am however, looking forward to enjoying foods that I wasn't able to eat, but I thought I would share a few recipes that I tried while on the fast with you.


This baked oatmeal is divine. It is seriously so delicious, nutritious and makes a whole 9x13 pan (which my roommate and I ate in 2 days).

Baked Oatmeal
3 cups old-fashioned rolled oats
3 cups unsweetened almond milk
1 cup unsweetened applesauce
1 cup dried fruit*
1/2 cup chopped pecans
1 tsp cinnamon
1/2 tsp salt

*You can use apricots, raisins, dates, cherries. Whatever suits your fancy. Just make sure to get dried fruit that does not have sugar added to it. You might have to go to a health foods store to find it.

Mix all the ingredients together and pour into a 9x13 that has been lightly greased with olive oil. Bake at 350*F for 40-50 minutes or until slightly browned on top. Serve warm with some peanut or almond butter on top. You could also serve this with some baked apple slices or fresh fruit like pineapple.

08 May 2012

Stir Fry

I had a friend over for lunch the other day, and by the other day I mean it was probably 2 months ago now. My how time flies! When I asked if there was anything specific that she wanted to eat, she said that she had really enjoyed the curry I made, so maybe something like that. I decided to make stir fry, mostly because I hadn't made it in a rather long time, and it sounded good to me.

Stir fry is super easy to make and can be altered so easily to fit different dietary needs. It is also super healthy and delicious.


Start by setting your rice to cooking because that will take the longest. I made sushi rice with coconut milk.  Next cook a couple of chicken breasts that have been cut into chunks. I cooked these in a little coconut oil and seasoned with curry powder, turmeric, cayenne pepper, garlic salt, cinnamon, and pepper. When the chicken is finished cooking set aside and keep warm.


Add to the wok cut up veggies of your choice. I think I used onion, carrots, broccoli, mushrooms, asparagus. It is best to use fresh veggies. You can also use bell peppers, zucchini or yellow squash, green beans, peas, really any vegetables you like. Allow these to cook until they are a little soft, but not all the way cooked. This gives you a nice crunch. Add the chicken back in and cook just a little longer.


Serve with the rice and eat right away. You can also use some soy sauce if you want that flavor.


This is a really great meal to make because it is fast and easy, but can be easily modified to suit almost anyone's taste buds. It is also really easy to make this a vegetarian meal.

06 May 2012

French Silk Pie


I keep mental files on people I know. Nothing creepy, just mental notes of what they like or don't like. I find it makes it easier to cook for people when you are able to make things that they enjoy. I have a very dear friend who loves french silk pie, but she does not like it with any whipped topping. Most french silk pies come topped with either cool whip or whipped cream, so whenever I see my friend (who lives far away from me) I make a point to make her some french silk pie. There are many versions of french silk pie, and this is mine.

French Silk Pie
3/4 cup butter, softened
1 1/2 cups powdered sugar
3 eggs
6 ounces chocolate, melted (I use a dark chocolate)
1 pie crust (I use an oreo crust)

Begin by beating the butter until it is smooth. Add in the powdered sugar and beat until incorporated. Add in the chocolate and beat until smooth. Add in the eggs and beat until the filling is stiffer and has become lighter. Spoon into pie shell and allow to sit in the fridge for several hours or until set. Keep refrigerated as this does have raw eggs in it. You may serve it with whipped cream or plain. You may also add in about a tablespoon of peppermint schnapps to make it a minty chocolate pie. Enjoy!

03 May 2012

One-Bowl Brownies

These brownies are possibly the first thing that I remember making on my own. They are called One-Bowl brownies because you make them all in one bowl.  And they are the prefect brownie to take to any event because they are super easy and fast to make, and they will be devoured because they are delicious!

One-Bowl Brownies
4 square unsweetened chocolate
3/4 cup unsalted butter
2 cups brown sugar
3 eggs*
1 tsp. vanilla
1 cup unbleached all-purpose flour


*I used applesauce to replace the eggs, but if you are making these for people who aren't used to applesauce replacement for eggs you will probably want to stick with the eggs as the applesauce does slightly change the consistency and flavor.

Start by putting the butter and chocolate in a microwave safe bowl and microwaving it for 2 minutes, checking it at 1 minute to stir. Be careful with how long you microwave it for because the chocolate can burn easily.


Stir until the chocolate is all melted. Add in the sugar and vanilla. I might have added a dusting of cinnamon here as well.


 Add in the eggs (or applesauce) and stir to combine.


 Add in the flour.


 Pour into a 9x13 pan or a 9x9 pan for thicker brownies. I also don't have a 9x9 pan so I use a 9x13.


Bake at 350*F for 30ish minutes. Here is where it helps to know your oven because you definitely don't want to cook these too long. You want them to be a little gooey in the center.


You can eat these with ice cream and Bailey's or some salted caramel sauce or just straight out of the pan when they are warm.

03 April 2012

Strawberry Cake


I have several recipes to add on here, but this one I had a request for which is why it is getting precedence. I made this for the Valentine's Day dinner that I hosted. I thought it fit well with Valentine's Day to make a pink cake, so Strawberry Cake was the winner. If you have been reading this blog for long, you know by now that I dislike using box cake mixes, and may I just say that it is extremely difficult to find a from scratch strawberry cake recipe. When I found this one I was sold. I made it once last fall, and it was so delicious, I knew it would be perfect for Valentine's. (I apologize for the lack of photos.)

Strawberry Cake
24 oz frozen strawberries, thawed
1/4 cup almond milk
4 eggs
1 Tbsp vanilla extract
2 1/4 cup cake flour
1 3/4 cup sugar
4 tsp baking powder
1 tsp salt
1 1/2 sticks unsalted butter, softened
dash cinnamon

Preheat oven to 350*F and grease two 8inch round cake pans and line the bottoms with a paper towel. Thaw strawberries and drain some of the liquid off using a strainer. Puree the strawberries using a food processor or blender. Reserve 3/4 cup puree for the cake and set the rest aside to add to the frosting. In a small bowl combine the puree, almond milk, eggs, and vanilla. Mix with a fork until well blended and set aside. In the bowl of a stand mixer mix together the cake flour, sugar, baking powder, salt and cinnamon. Mix to combine. Beating on low speed, beat in the butter until moist crumbles form. Add in the liquids and mix until combined. Pour evenly into the cake pans, smooth tops, and bake for 20 to 25 minutes or until a toothpick comes out clean. Allow to cool and then frost.

Cream Cheese Frosting
8 oz. cream cheese, softened
5 Tbsp. butter, softened
2 tsp. vanilla
2 1/2 cups powdered sugar
reserved strawberry puree

Beat the cream cheese until smooth. Add in butter and beat until smooth. Add in vanilla. Then add the powdered sugar and beat until smooth. Add in some of the strawberry puree, but not too much or the frosting will be runny.

To assemble, place one layer of cake on cake plate, top with some strawberry puree. Place other layer on top. Then frost and enjoy!!

Notes: You can also make this cake with fresh strawberries. I'm looking forward to trying that this summer when there are fresh ripe strawberries. Obviously, you will want to hull the strawberries before you puree them. 6 large egg whites can also be substituted for the 4 eggs. I haven't tried this recipe with applesauce instead of eggs, but it seems to me like it would be delicious and make this cake even more moist than it is already. Maybe next time I make it that will happen.

08 March 2012

pumpkin pancakes

The other morning something happened that has never happened before. My roommate and I ate breakfast together. We aren't really breakfast people. We like breakfast foods. We just tend not to like breakfast hours. We have frequently had brunch together, but never breakfast, until the other day that is. And what a breakfast to have. . .I seriously think I could dream about these pancakes. Absolutely delicious!! I adapted my recipe from Alice's Tea Cup's recipe.


Pumpkin Pancakes
1 cup unbleached all purpose flour
1/4 cup dark brown sugar
1 tsp. baking soda
1/2 Tbsp. baking powder
1/2 tsp. salt
1/2 tsp. ground nutmeg
1 1/2 tsp. ground cinnamon
1 cup buttermilk
3 Tbsp. unsalted butter, melted
3-6 Tbsp. unsweetened applesauce
1 cup pumpkin puree

Mix together the dry ingredients. Then one at a time add the buttermilk, butter, applesauce and pumpkin, mixing well with a spatula after each addition. Allow to sit for 15 minutes, then stir again. Then allow to sit for another 15 minutes. Cook on a griddle or in a skillet until bubbles form, flip and cook for another couple of minutes. Serve with butter and maple syrup. Yum!

P.S. I'm headed off to Mexico for 10 days starting tomorrow, but I'll be back after that, and I have some yummy recipes to share with you! Stay tuned!

07 February 2012

classic french


Chocolate Souffle. Yep. I don't even need to say anything else about it because it's just that good (or perhaps I'm tired and just don't want to take time to be descriptive and witty. . .you're choice).

Chocolate Souffle
1 Tbsp. white sugar
1/2 cup cocoa powder
1/4 cup unbleached all-purpose flour
sprinkle cinnamon
1/4 cup butter, softened
1 cup milk (I used almond milk)
1/2 cup dark brown sugar
1 tsp. vanilla
4 eggs, separated
2 Tbsp white sugar

Preheat oven to 350*F. Butter a 6 cup souffle dish. Or if you don't have a 6 cup souffle dish a springform pan works as well. Coat with 1 Tbsp. white sugar.

In a bowl stir together cocoa powder, cinnamon and flour. Add butter and blend well.

Heat milk in a medium saucepan until very hot. Reduce heat; add cocoa mixture, beating with a whisk until smooth and thick. Remove from heat and stir in dark brown sugar and vanilla. Cool slightly and add egg yolks one at a time beating well after each addition. Allow to cool to room temperature.

Beat the egg white until foamy and then gradually add the 2 Tbsp. white sugar and beat until stiff peaks form. Stir a small amount of egg whites into the chocolate mixture, then fold the chocolate mixture into the remaining egg whites. Pour into the prepared baking dish and bake for 30-45 minutes or until the top is puffed.

This is best served immediately. The picture shows it served with a creme anglaise sauce which I will post the recipe for some other time. You do not have to serve it with this sauce. It could also be served with ice cream or whipped cream.

06 February 2012

for bread lovers

Remember that new adventure I told you about a couple of posts back? Well here is the fruits of that adventure or rather the bread of that adventure.

Sourdough bread is not like yeast leavened bread which you can make all in one day. With sourdough you have to be planning ahead in order to make it because you have to make the starter if you don't have any sourdough starter. Then you have to make the sponge and then the final step is the actual bread. So like I said you have to be planning ahead in order to make this.

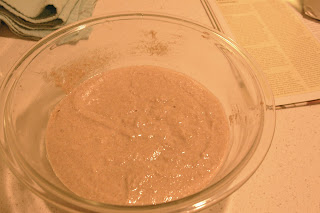
To make the starter you combine 2 cups of flour and 2 cups of water in a glass or ceramic bowl and stir it up. Then allow it to sit uncovered in a warm place for 2 to 5 days, stirring it occasionally. When the starter is ready it will have a clean, yeasty smell, small bubbles and will have a slightly thicker texture than it had to begin with.

The night before you want to make the bread you need to make the sponge. To make the sponge add 2 cups flour and 2 cups warm water to the starter then cover it and allow it to sit in a warm place overnight. The next step is very important! Before you start making the bread in the morning make sure you take out 1 cup of starter so that you have it to use the next time. If you forget (like I have) you have to start all over making the starter again (which I need to do. . .oops!).

This is the starter.

Now you are ready to make the bread. To the sponge add 6 cups flour (depending on what type of bread you want you can use different flour. I used a combination of unbleached all purpose flour and whole wheat.), 2 cups warm water, 2 tsp. salt, and 2 Tbsp. honey. Combine into a smooth dough and turn out onto a floured surface. Knead the dough with floured hands for 10 minutes, adding flour as necessary to prevent sticking.


Place the kneaded dough in a greased bowl and brush the top with oil. Cover and allow to rise in a warm place for about 3 hours or until doubled in size.

Reknead briefly and then split the dough in half and place in greased loaf pans. Brush the tops with a little more oil and allow to rise for 2ish hours. Slice the tops of the loaves and bake for about 40 minutes to an hour (depending on how hot your oven runs) in a 350* oven. Allow to cool for about 10 minutes and remove from the loaf pans. Enjoy warm with butter and strawberry jam or however else you enjoy your bread.

04 February 2012

Tiramisu

I greatly enjoy Tiramisu. It's one of those classic Italian desserts that just send you to another planet while you are savoring every last bite, and then you lick the plate. It is the perfect combination of slightly sweet, coffee, and creaminess. I first made Tiramisu probably three or four years ago, and it has been on my favorites list ever since. Here is my version.

Tiramisu
Espresso Syrup:
1/3 cup water
1/2 cup sugar
2/3 cup strong brewed espresso (or french pressed coffee)
1/4 cup coffee liqueur (or you can use brandy if preferred)
Cream Filling:
1 1/2 cups heavy whipping cream
1/3 cup sugar
2 tsp. vanilla
1 lb. mascarpone cheese, softened (I use the coffee one)
1/2 lb. ladyfingers
Cocoa Powder (for dusting)

Start by making an espresso syrup by combining the water and sugar in a saucepan. Bring to a simmer and stir to dissolve sugar. Remove from the heat and cool. Add in coffee and coffee liqueur and set aside until ready for layering.

Then make the filling by whipping the cream with the sugar and vanilla until soft peaks form. Then fold the cream into the softened mascarpone. You can also add some cinnamon into this mixture.

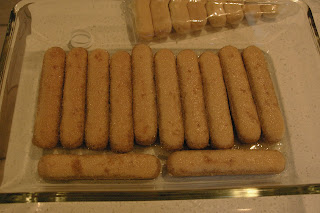
Now you are ready to assemble the Tiramisu. Start by putting a layer of ladyfingers in the bottom of a pan. Pour half of the espresso syrup over the ladyfingers. They will soak up the liquid, so don't freak out!


Then put half of the cream filling on top of the ladyfingers.


Add another layer of ladyfingers.


Pour the other half of the espresso syrup on them.


Then top with the remaining half of the cream filling.


You will want to cover this and let it chill in the fridge and set up overnight if possible. It gets better when it has a chance to sit for a while because the ladyfingers become nice and espresso-y. Before you serve this sprinkle the top with cocoa powder.

Then sit back and let your taste buds take you on a wonderful journey of blissful delight as you enjoy each and every bite of this deliciousness.

03 February 2012

Sugar Cookies

I have been living with an extreme dislike of making sugar cookies. Without going into any detail, sugar cookies were the cause of me ultimately quitting my last job. It has been almost a year since I have made sugar cookies because of that. There was honestly a part of me that believed I would never make sugar cookies again in my life because of my bad experience with them. The fact that I made sugar cookies and that I am blogging about them is an expression of my healing process.

These sugar cookies I have nothing but good memories to associate with them. When I was in college my aunt sent me a box of sugar cookies every year on Valentine's Day. Can I just tell you what a blessing that was, for me a single girl to receive a package on Valentine's Day? It was a big deal to me. So Aunt Lynda, if you are reading this, know that your cookies ministered greatly to my heart and still continue to! Thank you!

A while back my mom asked if I had my aunt's recipe for sugar cookies and told me that it was in our family cookbook (yes, we have a family cookbook, be jealous). The other day, I had a hankering to make her sugar cookies, so here they are.

Sugar Cookies
1 cup unsalted butter, softened
1 cup powdered sugar
1 egg
2 cups flour
1 tsp. baking soda
1 tsp. cream of tartar
1 tsp. vanilla
1 tsp. almond extract
1/4 tsp. salt

Preheat oven to 350*F. Cream together butter and powdered sugar.


Add egg and flavorings (I only used vanilla because I didn't have any almond on hand).


Add in flour, baking soda, cream of tartar, and salt and mix well.


At this point you can chill the dough if you desire to roll it out and cut out cookies, or if you still haven't quite recovered your love of making sugar cookies to that point, you can just drop spoonfuls of cookie dough onto cookie sheets and bake for 8-10 minutes. I baked mine for 4 minutes and then rotated my cookie sheets and baked another 3-4 minutes.


As I bit into one of these little babies, I was already thinking of variations I could make on these, so expect some more sugar cookie goodness to be headed your way soon!